Docker,部署
您可以在这里找到构建 litellm 代理的 Dockerfile
快速入门
要开始使用 Litellm,请在 shell 中运行以下命令
# Get the code
git clone https://github.com/BerriAI/litellm

# Go to folder
cd litellm

# Add the master key - you can change this after setup
echo 'LITELLM_MASTER_KEY="sk-1234"' > .env

# Add the litellm salt key - you cannot change this after adding a model
# It is used to encrypt / decrypt your LLM API Key credentials
# We recommend - https://1password.com/password-generator/
# password generator to get a random hash for litellm salt key
echo 'LITELLM_SALT_KEY="sk-1234"' >> .env

source .env

# Start
docker-compose up
Docker Run
步骤 1. 创建 config.yaml
litellm_config.yaml 示例
model_list:
  - model_name: azure-gpt-3.5
    litellm_params:
      model: azure/<your-azure-model-deployment>
      api_base: os.environ/AZURE_API_BASE # runs os.getenv("AZURE_API_BASE")
      api_key: os.environ/AZURE_API_KEY # runs os.getenv("AZURE_API_KEY")
      api_version: "2023-07-01-preview"
步骤 2. 运行 Docker 镜像
docker run \
    -v $(pwd)/litellm_config.yaml:/app/config.yaml \
    -e AZURE_API_KEY=d6*********** \
    -e AZURE_API_BASE=https://openai-***********/ \
    -p 4000:4000 \
    ghcr.io/berriai/litellm:main-latest \
    --config /app/config.yaml --detailed_debug
获取最新镜像 👉 这里
步骤 3. 测试请求
传递 model=azure-gpt-3.5,这在步骤 1 中已设置
curl --location 'http://0.0.0.0:4000/chat/completions' \
    --header 'Content-Type: application/json' \
    --data '{
    "model": "azure-gpt-3.5",
    "messages": [
        {
        "role": "user",
        "content": "what llm are you"
        }
    ]
}'
Docker Run - CLI 参数
在此查看所有支持的 CLI 参数
以下是如何运行 docker 镜像并将您的配置传递给 litellm
docker run ghcr.io/berriai/litellm:main-latest --config your_config.yaml
以下是如何运行 docker 镜像并在端口 8002 上以 num_workers=8 启动 litellm
docker run ghcr.io/berriai/litellm:main-latest --port 8002 --num_workers 8
使用 litellm 作为基础镜像
# Use the provided base image
FROM ghcr.io/berriai/litellm:main-latest

# Set the working directory to /app
WORKDIR /app

# Copy the configuration file into the container at /app
COPY config.yaml .

# Make sure your docker/entrypoint.sh is executable
RUN chmod +x ./docker/entrypoint.sh

# Expose the necessary port
EXPOSE 4000/tcp

# Override the CMD instruction with your desired command and arguments
# WARNING: FOR PROD DO NOT USE `--detailed_debug` it slows down response times, instead use the following CMD
# CMD ["--port", "4000", "--config", "config.yaml"]

CMD ["--port", "4000", "--config", "config.yaml", "--detailed_debug"]
从 litellm pip 包构建
按照这些说明从 litellm pip 包构建 Docker 容器。如果您的公司对安全性/构建镜像有严格要求,可以按照以下步骤操作。
Dockerfile
FROM cgr.dev/chainguard/python:latest-dev

USER root
WORKDIR /app

ENV HOME=/home/litellm
ENV PATH="${HOME}/venv/bin:$PATH"

# Install runtime dependencies
RUN apk update && \
    apk add --no-cache gcc python3-dev openssl openssl-dev

RUN python -m venv ${HOME}/venv
RUN ${HOME}/venv/bin/pip install --no-cache-dir --upgrade pip

COPY requirements.txt .
RUN --mount=type=cache,target=${HOME}/.cache/pip \
    ${HOME}/venv/bin/pip install -r requirements.txt

EXPOSE 4000/tcp

ENTRYPOINT ["litellm"]
CMD ["--port", "4000"]
requirements.txt 示例
litellm[proxy]==1.57.3 # Specify the litellm version you want to use
prometheus_client
langfuse
prisma
构建 docker 镜像
docker build \
  -f Dockerfile.build_from_pip \
  -t litellm-proxy-with-pip-5 .
运行 docker 镜像
docker run \
    -v $(pwd)/litellm_config.yaml:/app/config.yaml \
    -e OPENAI_API_KEY="sk-1222" \
    -e DATABASE_URL="postgresql://xxxxxxxxx \
    -p 4000:4000 \
    litellm-proxy-with-pip-5 \
    --config /app/config.yaml --detailed_debug
Terraform
鸣谢 Nicholas Cecere 提供的 LiteLLM 用户管理 Terraform
Kubernetes
部署基于配置文件的 litellm 实例只需要一个简单的部署,通过 config map 加载 config.yaml 文件。同时,使用环境变量声明 API 密钥,并将带有 API 密钥值的环境变量作为不透明秘密附加,这是一个好习惯。
apiVersion: v1
kind: ConfigMap
metadata:
  name: litellm-config-file
data:
  config.yaml: |
      model_list:
        - model_name: gpt-3.5-turbo
          litellm_params:
            model: azure/gpt-turbo-small-ca
            api_base: https://my-endpoint-canada-berri992.openai.azure.com/
            api_key: os.environ/CA_AZURE_OPENAI_API_KEY
---
apiVersion: v1
kind: Secret
type: Opaque
metadata:
  name: litellm-secrets
data:
  CA_AZURE_OPENAI_API_KEY: bWVvd19pbV9hX2NhdA== # your api key in base64
---
apiVersion: apps/v1
kind: Deployment
metadata:
  name: litellm-deployment
  labels:
    app: litellm
spec:
  selector:
    matchLabels:
      app: litellm
  template:
    metadata:
      labels:
        app: litellm
    spec:
      containers:
      - name: litellm
        image: ghcr.io/berriai/litellm:main-latest # it is recommended to fix a version generally
        ports:
        - containerPort: 4000
        volumeMounts:
        - name: config-volume
          mountPath: /app/proxy_server_config.yaml
          subPath: config.yaml
        envFrom:
        - secretRef:
            name: litellm-secrets
      volumes:
        - name: config-volume
          configMap:
            name: litellm-config-file
为避免可预测性问题、回滚困难和环境不一致,请使用版本控制或 SHA 摘要(例如,litellm:main-v1.30.3 或 litellm@sha256:12345abcdef...),而不是 litellm:main-latest。
Helm Chart
[Beta]Helm Chart 是 Beta 版本。如果您遇到任何问题/有任何反馈,请在https://github.com/BerriAI/litellm/issues 告知我们
当您想将 litellm Helm Chart 用作其他 Chart 的依赖项时,请使用此方法。litellm-helm OCI 托管在此处
步骤 1. 拉取 litellm Helm Chart
helm pull oci://ghcr.io/berriai/litellm-helm

# Pulled: ghcr.io/berriai/litellm-helm:0.1.2
# Digest: sha256:7d3ded1c99c1597f9ad4dc49d84327cf1db6e0faa0eeea0c614be5526ae94e2a
步骤 2. 解压 litellm Helm
解压步骤 1 中拉取的特定版本
tar -zxvf litellm-helm-0.1.2.tgz
步骤 3. 安装 litellm Helm
helm install lite-helm ./litellm-helm
步骤 4. 将服务暴露到 localhost
kubectl --namespace default port-forward $POD_NAME 8080:$CONTAINER_PORT
您的 LiteLLM 代理服务器现已在 http://127.0.0.1:4000 上运行。
就这些!这就是部署 litellm 的快速入门方法
发送 LLM API 请求
💡 请访问此处 👉 发送您的第一个 LLM API 请求
LiteLLM 兼容多种 SDK,包括 OpenAI SDK、Anthropic SDK、Mistral SDK、LLamaIndex、Langchain (Js, Python)
部署选项
| 文档 | 何时使用 |
|---|---|
| 快速入门 | 调用 100+ LLM + 负载均衡 |
| 使用数据库部署 | + 使用虚拟密钥 + 跟踪支出 (注意:使用数据库部署时,您的环境变量中必须提供 DATABASE_URL 和 LITELLM_MASTER_KEY ) |
| LiteLLM 容器 + Redis | + 在多个 litellm 容器之间进行负载均衡 |
| LiteLLM 数据库容器 + PostgresDB + Redis | + 使用虚拟密钥 + 跟踪支出 + 在多个 litellm 容器之间进行负载均衡 |
使用数据库部署
Docker, Kubernetes, Helm Chart
要求
- 需要一个 Postgres 数据库(例如 Supabase、Neon 等)在您的环境变量中设置
DATABASE_URL=postgresql://<user>:<password>@<host>:<port>/<dbname> - 设置一个
LITELLM_MASTER_KEY,这是您的代理管理员密钥 - 您可以使用此密钥创建其他密钥(🚨 必须以sk-开头)
- Dockerfile
- Kubernetes
- Helm
- Helm OCI Registry (GHCR)
我们维护一个单独的 Dockerfile,用于在使用连接的 Postgres 数据库运行 LiteLLM 代理时减少构建时间
docker pull ghcr.io/berriai/litellm-database:main-latest
docker run \
    -v $(pwd)/litellm_config.yaml:/app/config.yaml \
    -e LITELLM_MASTER_KEY=sk-1234 \
    -e DATABASE_URL=postgresql://<user>:<password>@<host>:<port>/<dbname> \
    -e AZURE_API_KEY=d6*********** \
    -e AZURE_API_BASE=https://openai-***********/ \
    -p 4000:4000 \
    ghcr.io/berriai/litellm-database:main-latest \
    --config /app/config.yaml --detailed_debug
您的 LiteLLM 代理服务器现已在 http://0.0.0.0:4000 上运行。
步骤 1. 创建 deployment.yaml
apiVersion: apps/v1
kind: Deployment
metadata:
  name: litellm-deployment
spec:
  replicas: 3
  selector:
    matchLabels:
      app: litellm
  template:
    metadata:
      labels:
        app: litellm
    spec:
      containers:
        - name: litellm-container
          image: ghcr.io/berriai/litellm:main-latest
          imagePullPolicy: Always
          env:
            - name: AZURE_API_KEY
              value: "d6******"
            - name: AZURE_API_BASE
              value: "https://ope******"
            - name: LITELLM_MASTER_KEY
              value: "sk-1234"
            - name: DATABASE_URL
              value: "po**********"
          args:
            - "--config"
            - "/app/proxy_config.yaml"  # Update the path to mount the config file
          volumeMounts:                 # Define volume mount for proxy_config.yaml
            - name: config-volume
              mountPath: /app
              readOnly: true
          livenessProbe:
            httpGet:
              path: /health/liveliness
              port: 4000
            initialDelaySeconds: 120
            periodSeconds: 15
            successThreshold: 1
            failureThreshold: 3
            timeoutSeconds: 10
          readinessProbe:
            httpGet:
              path: /health/readiness
              port: 4000
            initialDelaySeconds: 120
            periodSeconds: 15
            successThreshold: 1
            failureThreshold: 3
            timeoutSeconds: 10
      volumes:  # Define volume to mount proxy_config.yaml
        - name: config-volume
          configMap:
            name: litellm-config
kubectl apply -f /path/to/deployment.yaml
步骤 2. 创建 service.yaml
apiVersion: v1
kind: Service
metadata:
  name: litellm-service
spec:
  selector:
    app: litellm
  ports:
    - protocol: TCP
      port: 4000
      targetPort: 4000
  type: NodePort
kubectl apply -f /path/to/service.yaml
步骤 3. 启动服务器
kubectl port-forward service/litellm-service 4000:4000
您的 LiteLLM 代理服务器现已在 http://0.0.0.0:4000 上运行。
[Beta]Helm Chart 是 Beta 版本。如果您遇到任何问题/有任何反馈,请在https://github.com/BerriAI/litellm/issues 告知我们
使用此方法通过 Helm Chart 部署 litellm。链接到 LiteLLM Helm Chart
步骤 1. 克隆仓库
git clone https://github.com/BerriAI/litellm.git
步骤 2. 使用 Helm 部署
在您的 litellm 仓库根目录中运行以下命令。这将把 litellm 代理主密钥设置为 sk-1234
helm install \
  --set masterkey=sk-1234 \
  mydeploy \
  deploy/charts/litellm-helm
步骤 3. 将服务暴露到 localhost
kubectl \
  port-forward \
  service/mydeploy-litellm-helm \
  4000:4000
您的 LiteLLM 代理服务器现已在 http://127.0.0.1:4000 上运行。
如果您需要设置 litellm 代理的 config.yaml,您可以在 values.yaml 中找到它
[Beta]Helm Chart 是 Beta 版本。如果您遇到任何问题/有任何反馈,请在https://github.com/BerriAI/litellm/issues 告知我们
当您想将 litellm Helm Chart 用作其他 Chart 的依赖项时,请使用此方法。litellm-helm OCI 托管在此处
步骤 1. 拉取 litellm Helm Chart
helm pull oci://ghcr.io/berriai/litellm-helm

# Pulled: ghcr.io/berriai/litellm-helm:0.1.2
# Digest: sha256:7d3ded1c99c1597f9ad4dc49d84327cf1db6e0faa0eeea0c614be5526ae94e2a
步骤 2. 解压 litellm Helm
解压步骤 1 中拉取的特定版本
tar -zxvf litellm-helm-0.1.2.tgz
步骤 3. 安装 litellm Helm
helm install lite-helm ./litellm-helm
步骤 4. 将服务暴露到 localhost
kubectl --namespace default port-forward $POD_NAME 8080:$CONTAINER_PORT
您的 LiteLLM 代理服务器现已在 http://127.0.0.1:4000 上运行。
使用 Redis 部署
当您需要 litellm 在多个 litellm 容器之间进行负载均衡时,请使用 Redis
唯一需要的更改是在 config.yaml 中设置 Redis。LiteLLM 代理支持在多个 litellm 实例之间共享 rpm/tpm,传递 redis_host、redis_password 和 redis_port 可启用此功能。(LiteLLM 将使用 Redis 跟踪 rpm/tpm 使用情况)
model_list:
  - model_name: gpt-3.5-turbo
    litellm_params:
      model: azure/<your-deployment-name>
      api_base: <your-azure-endpoint>
      api_key: <your-azure-api-key>
      rpm: 6      # Rate limit for this deployment: in requests per minute (rpm)
  - model_name: gpt-3.5-turbo
    litellm_params:
      model: azure/gpt-turbo-small-ca
      api_base: https://my-endpoint-canada-berri992.openai.azure.com/
      api_key: <your-azure-api-key>
      rpm: 6
router_settings:
  redis_host: <your redis host>
  redis_password: <your redis password>
  redis_port: 1992
使用配置启动 docker 容器
docker run ghcr.io/berriai/litellm:main-latest --config your_config.yaml
使用数据库 + Redis 部署
唯一需要的更改是在 config.yaml 中设置 Redis。LiteLLM 代理支持在多个 litellm 实例之间共享 rpm/tpm,传递 redis_host、redis_password 和 redis_port 可启用此功能。(LiteLLM 将使用 Redis 跟踪 rpm/tpm 使用情况)
model_list:
  - model_name: gpt-3.5-turbo
    litellm_params:
      model: azure/<your-deployment-name>
      api_base: <your-azure-endpoint>
      api_key: <your-azure-api-key>
      rpm: 6      # Rate limit for this deployment: in requests per minute (rpm)
  - model_name: gpt-3.5-turbo
    litellm_params:
      model: azure/gpt-turbo-small-ca
      api_base: https://my-endpoint-canada-berri992.openai.azure.com/
      api_key: <your-azure-api-key>
      rpm: 6
router_settings:
  redis_host: <your redis host>
  redis_password: <your redis password>
  redis_port: 1992
使用配置启动 litellm-database docker 容器
docker run --name litellm-proxy \
-e DATABASE_URL=postgresql://<user>:<password>@<host>:<port>/<dbname> \
-p 4000:4000 \
ghcr.io/berriai/litellm-database:main-latest --config your_config.yaml
(非 Root 用户) - 无需互联网连接
默认情况下,prisma generate 会下载 Prisma 的引擎二进制文件。这可能导致在没有互联网连接的情况下运行出现错误。
使用此 Docker 镜像部署带有预生成 Prisma 二进制文件的 litellm。
docker pull ghcr.io/berriai/litellm-non_root:main-stable
高级部署设置
1. 自定义服务器根路径 (代理基础 URL)
💥 当您希望在自定义基础 URL 路径(例如 https://:4000/api/v1)上提供 LiteLLM 服务时,请使用此选项
在 Kubernetes 部署中,可以通过修改虚拟服务来利用共享 DNS 托管多个应用程序
自定义根路径可消除部署过程中使用多个 DNS 配置的需要。
步骤 1. 👉 在您的 .env 文件中设置 SERVER_ROOT_PATH,这将成为您的服务器根路径
export SERVER_ROOT_PATH="/api/v1"
步骤 2 (如果您希望代理管理 UI 在您的根路径下工作,您需要使用此 Dockerfile)
- 使用下面的 Dockerfile(它使用 litellm 作为基础镜像)
- 👉 在 Dockerfile 中设置
UI_BASE_PATH=$SERVER_ROOT_PATH/ui,例如UI_BASE_PATH=/api/v1/ui
Dockerfile
# Use the provided base image
FROM ghcr.io/berriai/litellm:main-latest

# Set the working directory to /app
WORKDIR /app

# Install Node.js and npm (adjust version as needed)
RUN apt-get update && apt-get install -y nodejs npm

# Copy the UI source into the container
COPY ./ui/litellm-dashboard /app/ui/litellm-dashboard

# Set an environment variable for UI_BASE_PATH
# This can be overridden at build time
# set UI_BASE_PATH to "<your server root path>/ui"
# 👇👇 Enter your UI_BASE_PATH here
ENV UI_BASE_PATH="/api/v1/ui"

# Build the UI with the specified UI_BASE_PATH
WORKDIR /app/ui/litellm-dashboard
RUN npm install
RUN UI_BASE_PATH=$UI_BASE_PATH npm run build

# Create the destination directory
RUN mkdir -p /app/litellm/proxy/_experimental/out

# Move the built files to the appropriate location
# Assuming the build output is in ./out directory
RUN rm -rf /app/litellm/proxy/_experimental/out/* && \
    mv ./out/* /app/litellm/proxy/_experimental/out/

# Switch back to the main app directory
WORKDIR /app

# Make sure your entrypoint.sh is executable
RUN chmod +x ./docker/entrypoint.sh

# Expose the necessary port
EXPOSE 4000/tcp

# Override the CMD instruction with your desired command and arguments
# only use --detailed_debug for debugging
CMD ["--port", "4000", "--config", "config.yaml"]
步骤 3 构建此 Dockerfile
docker build -f Dockerfile -t litellm-prod-build . --progress=plain
步骤 4. 在您的环境变量中设置 SERVER_ROOT_PATH 后运行代理
docker run \
    -v $(pwd)/proxy_config.yaml:/app/config.yaml \
    -p 4000:4000 \
    -e LITELLM_LOG="DEBUG"\
    -e SERVER_ROOT_PATH="/api/v1"\
    -e DATABASE_URL=postgresql://<user>:<password>@<host>:<port>/<dbname> \
    -e LITELLM_MASTER_KEY="sk-1234"\
    litellm-prod-build \
    --config /app/config.yaml
运行代理后,您可以通过 http://0.0.0.0:4000/api/v1/ 访问它(因为我们设置了 SERVER_ROOT_PATH="/api/v1")
步骤 5. 验证是否在正确路径上运行
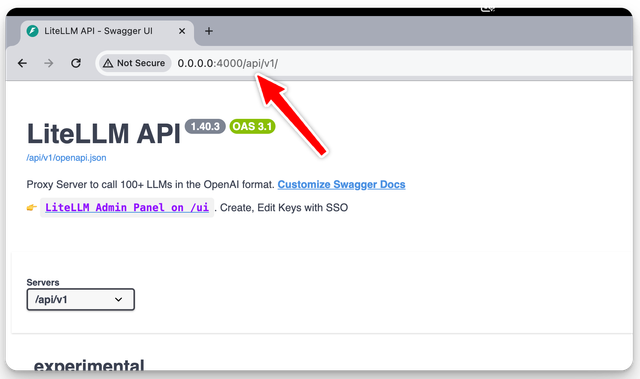
就这些,这就是您在自定义根路径上运行代理所需的一切
2. SSL 证书
如果您需要为您的本地 litellm 代理设置 SSL 证书,请使用此选项
启动 litellm 代理时,传递 ssl_keyfile_path (SSL 密钥文件路径) 和 ssl_certfile_path (SSL 证书文件路径)
docker run ghcr.io/berriai/litellm:main-latest \
    --ssl_keyfile_path ssl_test/keyfile.key \
    --ssl_certfile_path ssl_test/certfile.crt
启动 litellm 代理服务器时提供 SSL 证书
3. Http/2 与 Hypercorn
如果您想使用 Hypercorn 运行代理以支持 Http/2,请使用此选项
步骤 1. 构建带有 Hypercorn 的自定义 docker 镜像
# Use the provided base image
FROM ghcr.io/berriai/litellm:main-latest

# Set the working directory to /app
WORKDIR /app

# Copy the configuration file into the container at /app
COPY config.yaml .

# Make sure your docker/entrypoint.sh is executable
RUN chmod +x ./docker/entrypoint.sh

# Expose the necessary port
EXPOSE 4000/tcp

# 👉 Key Change: Install hypercorn
RUN pip install hypercorn

# Override the CMD instruction with your desired command and arguments
# WARNING: FOR PROD DO NOT USE `--detailed_debug` it slows down response times, instead use the following CMD
# CMD ["--port", "4000", "--config", "config.yaml"]

CMD ["--port", "4000", "--config", "config.yaml", "--detailed_debug"]
步骤 2. 启动代理时传递 --run_hypercorn 标志
docker run \
    -v $(pwd)/proxy_config.yaml:/app/config.yaml \
    -p 4000:4000 \
    -e LITELLM_LOG="DEBUG"\
    -e SERVER_ROOT_PATH="/api/v1"\
    -e DATABASE_URL=postgresql://<user>:<password>@<host>:<port>/<dbname> \
    -e LITELLM_MASTER_KEY="sk-1234"\
    your_custom_docker_image \
    --config /app/config.yaml
    --run_hypercorn
4. S3、GCS 存储桶对象/URL 上的 config.yaml 文件
如果您无法在部署服务上挂载配置文件(例如 AWS Fargate、Railway 等),请使用此选项
LiteLLM 代理将从 S3 存储桶或 GCS 存储桶读取您的 config.yaml
- GCS 存储桶
- S3
设置以下 .env 环境变量
LITELLM_CONFIG_BUCKET_TYPE = "gcs"                              # set this to "gcs"
LITELLM_CONFIG_BUCKET_NAME = "litellm-proxy"                    # your bucket name on GCS
LITELLM_CONFIG_BUCKET_OBJECT_KEY = "proxy_config.yaml"         # object key on GCS
使用这些环境变量启动 litellm 代理 - litellm 将从 GCS 读取您的配置
docker run --name litellm-proxy \
   -e DATABASE_URL=<database_url> \
   -e LITELLM_CONFIG_BUCKET_NAME=<bucket_name> \
   -e LITELLM_CONFIG_BUCKET_OBJECT_KEY="<object_key>> \
   -e LITELLM_CONFIG_BUCKET_TYPE="gcs" \
   -p 4000:4000 \
   ghcr.io/berriai/litellm-database:main-latest --detailed_debug
设置以下 .env 环境变量
LITELLM_CONFIG_BUCKET_NAME = "litellm-proxy"                    # your bucket name on s3
LITELLM_CONFIG_BUCKET_OBJECT_KEY = "litellm_proxy_config.yaml"  # object key on s3
使用这些环境变量启动 litellm 代理 - litellm 将从 S3 读取您的配置
docker run --name litellm-proxy \
   -e DATABASE_URL=<database_url> \
   -e LITELLM_CONFIG_BUCKET_NAME=<bucket_name> \
   -e LITELLM_CONFIG_BUCKET_OBJECT_KEY="<object_key>> \
   -p 4000:4000 \
   ghcr.io/berriai/litellm-database:main-latest
特定平台指南
- AWS EKS - Kubernetes
- AWS Cloud Formation Stack
- Google Cloud Run
- Render 部署
- Railway
Kubernetes (AWS EKS)
步骤 1. 创建具有以下规格的 EKS 集群
eksctl create cluster --name=litellm-cluster --region=us-west-2 --node-type=t2.small
步骤 2. 在 Kub 集群上挂载 litellm 代理配置
这会将您名为 proxy_config.yaml 的本地文件挂载到 Kubernetes 集群上
kubectl create configmap litellm-config --from-file=proxy_config.yaml
步骤 3. 应用 kub.yaml 和 service.yaml 克隆以下 kub.yaml 和 service.yaml 文件并在本地应用
使用此
kub.yaml文件 - litellm kub.yaml使用此
service.yaml文件 - litellm service.yaml
应用 kub.yaml
kubectl apply -f kub.yaml
应用 service.yaml - 创建 AWS 负载均衡器以暴露代理
kubectl apply -f service.yaml

# service/litellm-service created
步骤 4. 获取代理基础 URL
kubectl get services

# litellm-service   LoadBalancer   10.100.6.31   a472dc7c273fd47fd******.us-west-2.elb.amazonaws.com   4000:30374/TCP   63m
代理基础 URL = a472dc7c273fd47fd******.us-west-2.elb.amazonaws.com:4000
就这些,您现在可以开始使用 LiteLLM 代理了
AWS Cloud Formation Stack
LiteLLM AWS Cloudformation Stack - 获取最佳 LiteLLM 自动伸缩策略并为 LiteLLM 代理预置数据库
这将预置
- LiteLLMServer - EC2 实例
- LiteLLMServerAutoScalingGroup
- LiteLLMServerScalingPolicy (自动伸缩策略)
- LiteLLMDB - RDS::DBInstance
使用 AWS Cloud Formation Stack
LiteLLM Cloudformation Stack 位于此处 - litellm.yaml
1. 创建 CloudFormation Stack:
在 AWS 管理控制台中,导航到 CloudFormation 服务,然后点击“创建 Stack”。
在“创建 Stack”页面上,选择“上传模板文件”并选择 litellm.yaml 文件
现在监控 Stack 是否成功创建。
2. 获取数据库 URL:
Stack 创建成功后,获取数据库资源的 DatabaseURL,复制此值
3. 连接到 EC2 实例并在 EC2 容器上部署 litellm
从 EC2 控制台连接到 Stack 创建的实例(例如,使用 SSH)。
运行以下命令,将 <database_url> 替换为您在步骤 2 中复制的值
docker run --name litellm-proxy \
   -e DATABASE_URL=<database_url> \
   -p 4000:4000 \
   ghcr.io/berriai/litellm-database:main-latest
4. 访问应用程序:
容器运行后,您可以通过在浏览器中访问 http://<ec2-public-ip>:4000 来访问应用程序。
Google Cloud Run
编辑仓库中的
litellm_config.yaml文件以包含您的模型设置在 Google Cloud Run 上部署您 Fork 的 GitHub 仓库
测试您部署的代理
假设所需的密钥已设置为环境变量
https://litellm-7yjrj3ha2q-uc.a.run.app 是我们的示例代理,请将其替换为您部署的 Cloud Run 应用程序
curl https://litellm-7yjrj3ha2q-uc.a.run.app/v1/chat/completions \
  -H "Content-Type: application/json" \
  -d '{
     "model": "gpt-3.5-turbo",
     "messages": [{"role": "user", "content": "Say this is a test!"}],
     "temperature": 0.7
   }'
Render

其他
Docker Compose
步骤 1
- (推荐)使用项目根目录下提供的示例文件
docker-compose.yml。例如 https://github.com/BerriAI/litellm/blob/main/docker-compose.yml
这里是一个 docker-compose.yml 示例文件
version: "3.9"
services:
  litellm:
    build:
      context: .
      args:
        target: runtime
    image: ghcr.io/berriai/litellm:main-latest
    ports:
      - "4000:4000" # Map the container port to the host, change the host port if necessary
    volumes:
      - ./litellm-config.yaml:/app/config.yaml # Mount the local configuration file
    # You can change the port or number of workers as per your requirements or pass any new supported CLI argument. Make sure the port passed here matches with the container port defined above in `ports` value
    command: [ "--config", "/app/config.yaml", "--port", "4000", "--num_workers", "8" ]

# ...rest of your docker-compose config if any
步骤 2
创建与您的 docker-compose.yml 文件相对的 litellm-config.yaml 文件,其中包含您的 LiteLLM 配置。
在此查看配置文档
步骤 3
根据您的 docker 安装运行命令 docker-compose up 或 docker compose up。
使用
-d标志以分离模式(后台)运行容器,例如docker compose up -d
您的 LiteLLM 容器现在应该在定义的端口(例如 4000)上运行。
基于 IAM 的 RDS 数据库身份验证
- 设置 AWS 环境变量
export AWS_WEB_IDENTITY_TOKEN='/path/to/token'
export AWS_ROLE_NAME='arn:aws:iam::123456789012:role/MyRole'
export AWS_SESSION_NAME='MySession'
- 将 RDS 凭据添加到环境变量
export DATABASE_USER="db-user"
export DATABASE_PORT="5432"
export DATABASE_HOST="database-1-instance-1.cs1ksmwz2xt3.us-west-2.rds.amazonaws.com"
export DATABASE_NAME="database-1-instance-1"
export DATABASE_SCHEMA="schema-name" # skip to use the default "public" schema
- 使用 iam+rds 运行代理
litellm --config /path/to/config.yaml --iam_token_db_auth
✨ 阻止网络爬虫
注意:这是企业版专属功能。
为了阻止网络爬虫索引代理服务器端点,请在您的 litellm_config.yaml 文件中将 block_robots 设置为 true。
litellm_config.yamlgeneral_settings:
block_robots: true
工作原理
启用此功能后,/robots.txt 端点将返回状态码 200 并包含以下内容
robots.txtUser-agent: *
Disallow: /