✨ 企业版功能
要获取许可,请在此处与我们联系
功能
- 安全
- ✅ 管理界面的 SSO
- ✅ 带有保留策略的审计日志
- ✅ JWT 身份验证
- ✅ 控制可用的公共/私有路由(限制代理上的特定端点)
- ✅ 控制可用的公共/私有路由
- ✅ 秘密管理器 - AWS Key Manager、Google Secret Manager、Azure Key、Hashicorp Vault
- ✅ [BETA] AWS Key Manager v2 - 密钥解密
- ✅ 基于 IP 地址的访问控制列表
- ✅ 跟踪请求 IP 地址
- ✅ 在透传端点上使用 LiteLLM 密钥/身份验证
- ✅ 设置请求的最大请求大小 / 文件大小
- ✅ 对 LLM 请求强制执行必需参数(例如,拒绝缺少 ["metadata"]["generation_name"] 的请求)
- ✅ 密钥轮换
- 按项目自定义日志记录、护栏、缓存
- 支出跟踪与数据导出
- Prometheus 指标
- 按 API 密钥控制护栏
- 自定义品牌
安全
审计日志
存储对 Teams 和 Virtual Keys 执行的创建、更新、删除操作的审计日志
步骤 1 开启审计日志
litellm_settings:
  store_audit_logs: true
使用此配置启动 litellm proxy
步骤 2 测试 - 创建团队
curl --location 'http://0.0.0.0:4000/team/new' \
    --header 'Authorization: Bearer sk-1234' \
    --header 'Content-Type: application/json' \
    --data '{
        "max_budget": 2
    }'
步骤 3 预期日志
{
 "id": "e1760e10-4264-4499-82cd-c08c86c8d05b",
 "updated_at": "2024-06-06T02:10:40.836420+00:00",
 "changed_by": "109010464461339474872",
 "action": "created",
 "table_name": "LiteLLM_TeamTable",
 "object_id": "82e725b5-053f-459d-9a52-867191635446",
 "before_value": null,
 "updated_values": {
   "team_id": "82e725b5-053f-459d-9a52-867191635446",
   "admins": [],
   "members": [],
   "members_with_roles": [
     {
       "role": "admin",
       "user_id": "109010464461339474872"
     }
   ],
   "max_budget": 2.0,
   "models": [],
   "blocked": false
 }
}
阻止网络爬虫
要阻止网络爬虫索引代理服务器端点,请在您的 litellm_config.yaml 文件中将 block_robots 设置为 true。
general_settings:
  block_robots: true
工作原理
启用此设置后,/robots.txt 端点将返回 200 状态码和以下内容
User-agent: *
Disallow: /
LLM 请求的必需参数
当您希望强制所有请求包含特定参数时使用此项。例如,您需要所有请求包含 user 和 ["metadata"]["generation_name"] 参数。
- 在配置中设置
- 在密钥中设置
步骤 1 在 config.yaml 中定义要强制执行的所有参数
这意味着在所有发送给 LiteLLM 的 LLM 请求中,["user"] 和 ["metadata"]["generation_name"] 都是必需的
general_settings:
  master_key: sk-1234
  enforced_params:
    - user
    - metadata.generation_name
curl -L -X POST 'http://0.0.0.0:4000/key/generate' \
-H 'Authorization: Bearer sk-1234' \
-H 'Content-Type: application/json' \
-d '{
    "enforced_params": ["user", "metadata.generation_name"]
}'
步骤 2 验证是否有效
- 无效请求(未传递
user) - 无效请求(未传递
metadata) - 有效请求
curl --location 'https://:4000/chat/completions' \
    --header 'Authorization: Bearer sk-5fmYeaUEbAMpwBNT-QpxyA' \
    --header 'Content-Type: application/json' \
    --data '{
    "model": "gpt-3.5-turbo",
    "messages": [
        {
        "role": "user",
        "content": "hi"
        }
    ]
}'
预期响应
{"error":{"message":"Authentication Error, BadRequest please pass param=user in request body. This is a required param","type":"auth_error","param":"None","code":401}}%
curl --location 'https://:4000/chat/completions' \
    --header 'Authorization: Bearer sk-5fmYeaUEbAMpwBNT-QpxyA' \
    --header 'Content-Type: application/json' \
    --data '{
    "model": "gpt-3.5-turbo",
    "user": "gm",
    "messages": [
        {
        "role": "user",
        "content": "hi"
        }
    ],
   "metadata": {}
}'
预期响应
{"error":{"message":"Authentication Error, BadRequest please pass param=[metadata][generation_name] in request body. This is a required param","type":"auth_error","param":"None","code":401}}%
curl --location 'https://:4000/chat/completions' \
    --header 'Authorization: Bearer sk-5fmYeaUEbAMpwBNT-QpxyA' \
    --header 'Content-Type: application/json' \
    --data '{
    "model": "gpt-3.5-turbo",
    "user": "gm",
    "messages": [
        {
        "role": "user",
        "content": "hi"
        }
    ],
   "metadata": {"generation_name": "prod-app"}
}'
预期响应
{"id":"chatcmpl-9XALnHqkCBMBKrOx7Abg0hURHqYtY","choices":[{"finish_reason":"stop","index":0,"message":{"content":"Hello! How can I assist you today?","role":"assistant"}}],"created":1717691639,"model":"gpt-3.5-turbo-0125","object":"chat.completion","system_fingerprint":null,"usage":{"completion_tokens":9,"prompt_tokens":8,"total_tokens":17}}%
控制可用的公共/私有路由
限制代理的特定端点
❓ 在以下情况下使用此项:
- 将现有私有路由变为 -> 公共
- 将某些路由设置为仅限管理员访问的路由
用法 - 定义公共路由和仅限管理员访问的路由
步骤 1 - 在 config.yaml 中设置
| 路由类型 | 可选 | 需要虚拟密钥身份验证 | 管理员可访问 | 所有角色可访问 | 说明 |
|---|---|---|---|---|---|
public_routes | ✅ | ❌ | ✅ | ✅ | 无需任何身份验证即可访问的路由 |
admin_only_routes | ✅ | ✅ | ✅ | ❌ | 仅限代理管理员访问的路由 |
allowed_routes | ✅ | ✅ | ✅ | ✅ | 代理上暴露的路由。如果未设置,则暴露所有路由。 |
LiteLLMRoutes.public_routes 是一个 ENUM,对应于 LiteLLM 上的默认公共路由。您可以在此处查看
general_settings:
  master_key: sk-1234
  public_routes: ["LiteLLMRoutes.public_routes", "/spend/calculate"]     # routes that can be accessed without any auth
  admin_only_routes: ["/key/generate"]  # Optional - routes that can only be accessed by Proxy Admin
  allowed_routes: ["/chat/completions", "/spend/calculate", "LiteLLMRoutes.public_routes"] # Optional - routes that can be accessed by anyone after Authentication
步骤 2 - 启动代理
litellm --config config.yaml
步骤 3 - 测试
- 测试
public_routes - 测试
admin_only_routes - 测试
allowed_routes
curl --request POST \
  --url 'https://:4000/spend/calculate' \
  --header 'Content-Type: application/json' \
  --data '{
    "model": "gpt-4",
    "messages": [{"role": "user", "content": "Hey, how'\''s it going?"}]
  }'
🎉 预期此端点在没有 Authorization / Bearer Token 的情况下也能工作
请求成功
curl --location 'http://0.0.0.0:4000/key/generate' \
--header 'Authorization: Bearer <your-master-key>' \
--header 'Content-Type: application/json' \
--data '{}'
请求失败
 curl --location 'http://0.0.0.0:4000/key/generate' \
--header 'Authorization: Bearer <virtual-key-from-non-admin>' \
--header 'Content-Type: application/json' \
--data '{"user_role": "internal_user"}'
预期响应
{
  "error": {
    "message": "user not allowed to access this route. Route=/key/generate is an admin only route",
    "type": "auth_error",
    "param": "None",
    "code": "403"
  }
}
请求成功
curl https://:4000/chat/completions \
-H "Content-Type: application/json" \
-H "Authorization: Bearer sk-1234" \
-d '{
"model": "fake-openai-endpoint",
"messages": [
    {"role": "user", "content": "Hello, Claude"}
]
}'
请求失败
curl --location 'http://0.0.0.0:4000/embeddings' \
--header 'Content-Type: application/json' \
-H "Authorization: Bearer sk-1234" \
--data ' {
"model": "text-embedding-ada-002",
"input": ["write a litellm poem"]
}'
预期响应
{
  "error": {
    "message": "Route /embeddings not allowed",
    "type": "auth_error",
    "param": "None",
    "code": "403"
  }
}
支出跟踪
自定义标签
要求
- 应设置虚拟密钥和数据库,请参阅虚拟密钥
用法 - 使用请求标签发送 /chat/completions 请求
- 在密钥中设置
- 在团队上设置
- OpenAI Python v1.0.0+
- OpenAI JS
- Curl 请求
- Langchain
curl -L -X POST 'http://0.0.0.0:4000/key/generate' \
-H 'Authorization: Bearer sk-1234' \
-H 'Content-Type: application/json' \
-d '{
    "metadata": {
        "tags": ["tag1", "tag2", "tag3"]
    }
}

'
curl -L -X POST 'http://0.0.0.0:4000/team/new' \
-H 'Authorization: Bearer sk-1234' \
-H 'Content-Type: application/json' \
-d '{
    "metadata": {
        "tags": ["tag1", "tag2", "tag3"]
    }
}

'
将 extra_body={"metadata": { }} 设置为您想传递的 metadata
import openai
client = openai.OpenAI(
    api_key="anything",
    base_url="http://0.0.0.0:4000"
)


response = client.chat.completions.create(
    model="gpt-3.5-turbo",
    messages = [
        {
            "role": "user",
            "content": "this is a test request, write a short poem"
        }
    ],
    extra_body={
        "metadata": {
            "tags": ["model-anthropic-claude-v2.1", "app-ishaan-prod"] # 👈 Key Change
        }
    }
)

print(response)
const openai = require('openai');

async function runOpenAI() {
  const client = new openai.OpenAI({
    apiKey: 'sk-1234',
    baseURL: 'http://0.0.0.0:4000'
  });

  try {
    const response = await client.chat.completions.create({
      model: 'gpt-3.5-turbo',
      messages: [
        {
          role: 'user',
          content: "this is a test request, write a short poem"
        },
      ],
      metadata: {
        tags: ["model-anthropic-claude-v2.1", "app-ishaan-prod"] // 👈 Key Change
      }
    });
    console.log(response);
  } catch (error) {
    console.log("got this exception from server");
    console.error(error);
  }
}

// Call the asynchronous function
runOpenAI();
将 metadata 作为请求体的一部分传递
curl --location 'http://0.0.0.0:4000/chat/completions' \
    --header 'Content-Type: application/json' \
    --data '{
    "model": "gpt-3.5-turbo",
    "messages": [
        {
        "role": "user",
        "content": "what llm are you"
        }
    ],
    "metadata": {"tags": ["model-anthropic-claude-v2.1", "app-ishaan-prod"]}
}'
from langchain.chat_models import ChatOpenAI
from langchain.prompts.chat import (
    ChatPromptTemplate,
    HumanMessagePromptTemplate,
    SystemMessagePromptTemplate,
)
from langchain.schema import HumanMessage, SystemMessage

chat = ChatOpenAI(
    openai_api_base="http://0.0.0.0:4000",
    model = "gpt-3.5-turbo",
    temperature=0.1,
    extra_body={
        "metadata": {
            "tags": ["model-anthropic-claude-v2.1", "app-ishaan-prod"]
        }
    }
)

messages = [
    SystemMessage(
        content="You are a helpful assistant that im using to make a test request to."
    ),
    HumanMessage(
        content="test from litellm. tell me why it's amazing in 1 sentence"
    ),
]
response = chat(messages)

print(response)
按标签查看支出
/spend/tags 请求格式
curl -X GET "http://0.0.0.0:4000/spend/tags" \
-H "Authorization: Bearer sk-1234"
/spend/tags 响应格式
[
  {
    "individual_request_tag": "model-anthropic-claude-v2.1",
    "log_count": 6,
    "total_spend": 0.000672
  },
  {
    "individual_request_tag": "app-ishaan-local",
    "log_count": 4,
    "total_spend": 0.000448
  },
  {
    "individual_request_tag": "app-ishaan-prod",
    "log_count": 2,
    "total_spend": 0.000224
  }
]
使用自定义元数据跟踪支出
要求
- 应设置虚拟密钥和数据库,请参阅虚拟密钥
用法 - 使用特殊支出日志元数据发送 /chat/completions 请求
- 在密钥中设置
- 在团队上设置
- OpenAI Python v1.0.0+
- OpenAI JS
- Curl 请求
- Langchain
curl -L -X POST 'http://0.0.0.0:4000/key/generate' \
-H 'Authorization: Bearer sk-1234' \
-H 'Content-Type: application/json' \
-d '{
    "metadata": {
      "spend_logs_metadata": {
          "hello": "world"
      }
    }
}

'
curl -L -X POST 'http://0.0.0.0:4000/team/new' \
-H 'Authorization: Bearer sk-1234' \
-H 'Content-Type: application/json' \
-d '{
    "metadata": {
      "spend_logs_metadata": {
          "hello": "world"
      }
    }
}

'
将 extra_body={"metadata": { }} 设置为您想传递的 metadata
import openai
client = openai.OpenAI(
    api_key="anything",
    base_url="http://0.0.0.0:4000"
)

# request sent to model set on litellm proxy, `litellm --model`
response = client.chat.completions.create(
    model="gpt-3.5-turbo",
    messages = [
        {
            "role": "user",
            "content": "this is a test request, write a short poem"
        }
    ],
    extra_body={
        "metadata": {
            "spend_logs_metadata": {
                "hello": "world"
            }
        }
    }
)

print(response)
const openai = require('openai');

async function runOpenAI() {
  const client = new openai.OpenAI({
    apiKey: 'sk-1234',
    baseURL: 'http://0.0.0.0:4000'
  });

  try {
    const response = await client.chat.completions.create({
      model: 'gpt-3.5-turbo',
      messages: [
        {
          role: 'user',
          content: "this is a test request, write a short poem"
        },
      ],
      metadata: {
        spend_logs_metadata: { // 👈 Key Change
            hello: "world"
        }
      }
    });
    console.log(response);
  } catch (error) {
    console.log("got this exception from server");
    console.error(error);
  }
}

// Call the asynchronous function
runOpenAI();
将 metadata 作为请求体的一部分传递
curl --location 'http://0.0.0.0:4000/chat/completions' \
    --header 'Content-Type: application/json' \
    --data '{
    "model": "gpt-3.5-turbo",
    "messages": [
        {
        "role": "user",
        "content": "what llm are you"
        }
    ],
    "metadata": {
        "spend_logs_metadata": {
            "hello": "world"
        }
    }
}'
from langchain.chat_models import ChatOpenAI
from langchain.prompts.chat import (
    ChatPromptTemplate,
    HumanMessagePromptTemplate,
    SystemMessagePromptTemplate,
)
from langchain.schema import HumanMessage, SystemMessage

chat = ChatOpenAI(
    openai_api_base="http://0.0.0.0:4000",
    model = "gpt-3.5-turbo",
    temperature=0.1,
    extra_body={
        "metadata": {
            "spend_logs_metadata": {
                "hello": "world"
            }
        }
    }
)

messages = [
    SystemMessage(
        content="You are a helpful assistant that im using to make a test request to."
    ),
    HumanMessage(
        content="test from litellm. tell me why it's amazing in 1 sentence"
    ),
]
response = chat(messages)

print(response)
查看带自定义元数据的支出
/spend/logs 请求格式
curl -X GET "http://0.0.0.0:4000/spend/logs?request_id=<your-call-id" \ # e.g.: chatcmpl-9ZKMURhVYSi9D6r6PJ9vLcayIK0Vm
-H "Authorization: Bearer sk-1234"
/spend/logs 响应格式
[
    {
        "request_id": "chatcmpl-9ZKMURhVYSi9D6r6PJ9vLcayIK0Vm",
        "call_type": "acompletion",
        "metadata": {
            "user_api_key": "88dc28d0f030c55ed4ab77ed8faf098196cb1c05df778539800c9f1243fe6b4b",
            "user_api_key_alias": null,
            "spend_logs_metadata": { # 👈 LOGGED CUSTOM METADATA
                "hello": "world"
            },
            "user_api_key_team_id": null,
            "user_api_key_user_id": "116544810872468347480",
            "user_api_key_team_alias": null
        },
    }
]
护栏 - 秘密检测/修订
❓ 使用此项可对发送到 LLM 的请求中的 API 密钥、秘密进行修订。
例如,如果您想修订以下请求中 OPENAI_API_KEY 的值
传入请求
{
    "messages": [
        {
            "role": "user",
            "content": "Hey, how's it going, API_KEY = 'sk_1234567890abcdef'",
        }
    ]
}
审核后的请求
{
    "messages": [
        {
            "role": "user",
            "content": "Hey, how's it going, API_KEY = '[REDACTED]'",
        }
    ]
}
用法
步骤 1 将此添加到您的 config.yaml
litellm_settings:
  callbacks: ["hide_secrets"]
步骤 2 使用 --detailed_debug 运行 litellm proxy 以查看服务器日志
litellm --config config.yaml --detailed_debug
步骤 3 使用请求测试
发送此请求
curl --location 'https://:4000/chat/completions' \
    --header 'Authorization: Bearer sk-1234' \
    --header 'Content-Type: application/json' \
    --data '{
    "model": "llama3",
    "messages": [
        {
        "role": "user",
        "content": "what is the value of my open ai key? openai_api_key=sk-1234998222"
        }
    ]
}'
预期在您的 litellm 服务器日志中看到以下警告
LiteLLM Proxy:WARNING: secret_detection.py:88 - Detected and redacted secrets in message: ['Secret Keyword']
您还可以查看从 litellm 发送到 API 提供商的原始请求
POST Request Sent from LiteLLM:
curl -X POST \
https://api.groq.com/openai/v1/ \
-H 'Authorization: Bearer gsk_mySVchjY********************************************' \
-d {
  "model": "llama3-8b-8192",
  "messages": [
    {
      "role": "user",
      "content": "what is the time today, openai_api_key=[REDACTED]"
    }
  ],
  "stream": false,
  "extra_body": {}
}
按 API 密钥开启/关闭秘密检测
❓ 在需要按 API 密钥开启/关闭护栏时使用此项
步骤 1 创建禁用 hide_secrets 的密钥
👉 使用 /key/generate 或 /key/update 设置 "permissions": {"hide_secrets": false}
这意味着对于来自此 API 密钥的所有请求,hide_secrets 护栏检查已关闭
- /key/generate
- /key/update
curl --location 'http://0.0.0.0:4000/key/generate' \
    --header 'Authorization: Bearer sk-1234' \
    --header 'Content-Type: application/json' \
    --data '{
        "permissions": {"hide_secrets": false}
}'
# {"permissions":{"hide_secrets":false},"key":"sk-jNm1Zar7XfNdZXp49Z1kSQ"}
curl --location 'http://0.0.0.0:4000/key/update' \
    --header 'Authorization: Bearer sk-1234' \
    --header 'Content-Type: application/json' \
    --data '{
        "key": "sk-jNm1Zar7XfNdZXp49Z1kSQ",
        "permissions": {"hide_secrets": false}
}'
# {"permissions":{"hide_secrets":false},"key":"sk-jNm1Zar7XfNdZXp49Z1kSQ"}
步骤 2 使用新密钥测试
curl --location 'http://0.0.0.0:4000/chat/completions' \
    --header 'Authorization: Bearer sk-jNm1Zar7XfNdZXp49Z1kSQ' \
    --header 'Content-Type: application/json' \
    --data '{
    "model": "llama3",
    "messages": [
        {
        "role": "user",
        "content": "does my openai key look well formatted OpenAI_API_KEY=sk-1234777"
        }
    ]
}'
预期在您的回调的服务器日志中看到 sk-1234777。
对此请求未运行 hide_secrets 护栏检查,因为 API 密钥 sk-jNm1Zar7XfNdZXp49Z1kSQ 的 "permissions": {"hide_secrets": false}。
内容审核
使用 LLM Guard 进行内容审核
在您的环境中设置 LLM Guard API Base
LLM_GUARD_API_BASE = "http://0.0.0.0:8192" # deployed llm guard api
添加 llmguard_moderations 作为回调
litellm_settings:
    callbacks: ["llmguard_moderations"]
现在您可以轻松测试它了
进行一次常规的 /chat/completion 调用
检查您的代理日志中是否有包含
LLM Guard:的语句
预期结果
LLM Guard: Received response - {"sanitized_prompt": "hello world", "is_valid": true, "scanners": { "Regex": 0.0 }}
按密钥开启/关闭
1. 更新配置
litellm_settings:
    callbacks: ["llmguard_moderations"]
    llm_guard_mode: "key-specific"
2. 创建新密钥
curl --location 'https://:4000/key/generate' \
--header 'Authorization: Bearer sk-1234' \
--header 'Content-Type: application/json' \
--data '{
    "models": ["fake-openai-endpoint"],
    "permissions": {
        "enable_llm_guard_check": true # 👈 KEY CHANGE
    }
}'

# Returns {..'key': 'my-new-key'}
3. 测试它!
curl --location 'http://0.0.0.0:4000/v1/chat/completions' \
--header 'Content-Type: application/json' \
--header 'Authorization: Bearer my-new-key' \ # 👈 TEST KEY
--data '{"model": "fake-openai-endpoint", "messages": [
        {"role": "system", "content": "Be helpful"},
        {"role": "user", "content": "What do you know?"}
    ]
    }'
按请求开启/关闭
1. 更新配置
litellm_settings:
    callbacks: ["llmguard_moderations"]
    llm_guard_mode: "request-specific"
2. 创建新密钥
curl --location 'https://:4000/key/generate' \
--header 'Authorization: Bearer sk-1234' \
--header 'Content-Type: application/json' \
--data '{
    "models": ["fake-openai-endpoint"],
}'

# Returns {..'key': 'my-new-key'}
3. 测试它!
- OpenAI Python v1.0.0+
- Curl 请求
import openai
client = openai.OpenAI(
    api_key="sk-1234",
    base_url="http://0.0.0.0:4000"
)

# request sent to model set on litellm proxy, `litellm --model`
response = client.chat.completions.create(
    model="gpt-3.5-turbo",
    messages = [
        {
            "role": "user",
            "content": "this is a test request, write a short poem"
        }
    ],
    extra_body={ # pass in any provider-specific param, if not supported by openai, https://docs.litellm.com.cn/docs/completion/input#provider-specific-params
        "metadata": {
            "permissions": {
                "enable_llm_guard_check": True # 👈 KEY CHANGE
            },
        }
    }
)

print(response)
curl --location 'http://0.0.0.0:4000/v1/chat/completions' \
--header 'Content-Type: application/json' \
--header 'Authorization: Bearer my-new-key' \ # 👈 TEST KEY
--data '{"model": "fake-openai-endpoint", "messages": [
        {"role": "system", "content": "Be helpful"},
        {"role": "user", "content": "What do you know?"}
    ]
    }'
使用 LlamaGuard 进行内容审核
目前与 Sagemaker 的 LlamaGuard 端点兼容。
如何在您的 config.yaml 中启用此项
litellm_settings:
   callbacks: ["llamaguard_moderations"]
   llamaguard_model_name: "sagemaker/jumpstart-dft-meta-textgeneration-llama-guard-7b"
确保您的环境中有所需密钥,例如
os.environ["AWS_ACCESS_KEY_ID"] = ""
os.environ["AWS_SECRET_ACCESS_KEY"] = ""
os.environ["AWS_REGION_NAME"] = ""
自定义 LlamaGuard Prompt
要修改 llama guard 评估的不安全类别,只需创建此类别列表的您自己的版本即可
将您的代理指向它
callbacks: ["llamaguard_moderations"]
  llamaguard_model_name: "sagemaker/jumpstart-dft-meta-textgeneration-llama-guard-7b"
  llamaguard_unsafe_content_categories: /path/to/llamaguard_prompt.txt
使用 Google 文本审核进行内容审核
需要在您的 .env 中设置 GOOGLE_APPLICATION_CREDENTIALS(与 VertexAI 相同)。
如何在您的 config.yaml 中启用此项
litellm_settings:
   callbacks: ["google_text_moderation"]
设置自定义置信度阈值
Google Moderations 根据多个类别检查文本。来源
设置全局默认置信度阈值
默认情况下,此值设置为 0.8。但您可以在 config.yaml 中覆盖此值。
litellm_settings:
    google_moderation_confidence_threshold: 0.4
设置特定类别置信度阈值
在您的 config.yaml 中设置特定类别的置信度阈值。如果未设置,将使用全局默认值。
litellm_settings:
    toxic_confidence_threshold: 0.1
以下是特定类别的值
| 类别 | 设置 |
|---|---|
| "toxic" | toxic_confidence_threshold: 0.1 |
| "insult" | insult_confidence_threshold: 0.1 |
| "profanity" | profanity_confidence_threshold: 0.1 |
| "derogatory" | derogatory_confidence_threshold: 0.1 |
| "sexual" | sexual_confidence_threshold: 0.1 |
| "death_harm_and_tragedy" | death_harm_and_tragedy_threshold: 0.1 |
| "violent" | violent_threshold: 0.1 |
| "firearms_and_weapons" | firearms_and_weapons_threshold: 0.1 |
| "public_safety" | public_safety_threshold: 0.1 |
| "health" | health_threshold: 0.1 |
| "religion_and_belief" | religion_and_belief_threshold: 0.1 |
| "illicit_drugs" | illicit_drugs_threshold: 0.1 |
| "war_and_conflict" | war_and_conflict_threshold: 0.1 |
| "politics" | politics_threshold: 0.1 |
| "finance" | finance_threshold: 0.1 |
| "legal" | legal_threshold: 0.1 |
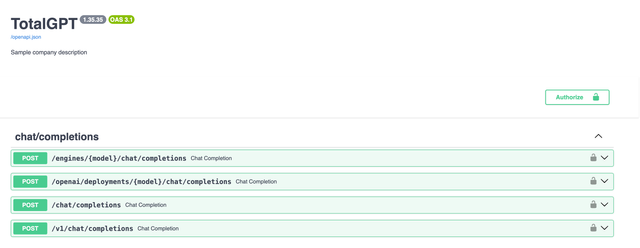
Swagger 文档 - 自定义路由 + 品牌
需要使用 LiteLLM 企业版密钥。在此处获取免费 2 周试用许可here
在您的环境中设置 LiteLLM 密钥
LITELLM_LICENSE=""
自定义标题 + 描述
在您的环境中,设置
DOCS_TITLE="TotalGPT"
DOCS_DESCRIPTION="Sample Company Description"
自定义路由
向用户隐藏管理员路由。
在您的环境中,设置
DOCS_FILTERED="True" # only shows openai routes to user
启用被屏蔽用户列表
如果使用此用户 ID 向代理发出任何调用,都将被拒绝 - 如果您希望允许用户选择退出 AI 功能,请使用此项
litellm_settings:
     callbacks: ["blocked_user_check"]
     blocked_user_list: ["user_id_1", "user_id_2", ...]  # can also be a .txt filepath e.g. `/relative/path/blocked_list.txt`
如何测试
- OpenAI Python v1.0.0+
- Curl 请求
将 user=<user_id> 设置为可能已选择退出的用户的用户 ID。
import openai
client = openai.OpenAI(
    api_key="sk-1234",
    base_url="http://0.0.0.0:4000"
)

# request sent to model set on litellm proxy, `litellm --model`
response = client.chat.completions.create(
    model="gpt-3.5-turbo",
    messages = [
        {
            "role": "user",
            "content": "this is a test request, write a short poem"
        }
    ],
    user="user_id_1"
)

print(response)
curl --location 'http://0.0.0.0:4000/chat/completions' \
--header 'Content-Type: application/json' \
--data ' {
      "model": "gpt-3.5-turbo",
      "messages": [
        {
          "role": "user",
          "content": "what llm are you"
        }
      ],
      "user": "user_id_1" # this is also an openai supported param
    }
'
通过 API 使用
屏蔽某个客户 ID 的所有调用
curl -X POST "http://0.0.0.0:4000/customer/block" \
-H "Authorization: Bearer sk-1234" \
-D '{
"user_ids": [<user_id>, ...]
}'
解除屏蔽某个用户 ID 的调用
curl -X POST "http://0.0.0.0:4000/user/unblock" \
-H "Authorization: Bearer sk-1234" \
-D '{
"user_ids": [<user_id>, ...]
}'
启用禁用关键词列表
litellm_settings:
     callbacks: ["banned_keywords"]
     banned_keywords_list: ["hello"] # can also be a .txt file - e.g.: `/relative/path/keywords.txt`
测试此项
curl --location 'http://0.0.0.0:4000/chat/completions' \
--header 'Content-Type: application/json' \
--data ' {
      "model": "gpt-3.5-turbo",
      "messages": [
        {
          "role": "user",
          "content": "Hello world!"
        }
      ]
    }
'
公共模型中心
分享可用模型的公共页面供用户查看

[BETA]AWS Key Manager - 密钥解密
这是 Beta 版功能,可能会发生变化。
步骤 1. 将 USE_AWS_KMS 添加到 env
USE_AWS_KMS="True"
步骤 2. 将 LITELLM_SECRET_AWS_KMS_ 添加到 env 中的加密密钥
LITELLM_SECRET_AWS_KMS_DATABASE_URL="AQICAH.."
LiteLLM 将找到此项并在运行时使用解密的 DATABASE_URL="postgres://.." 值。
步骤 3. 启动代理
$ litellm
工作原理是什么?
- 密钥解密在服务器启动前运行。代码
- 它将解密后的值添加到 python 进程的
os.environ中。
注意:在 Python 脚本中使用 os.environ 设置环境变量,不会使该变量可通过 SSH 会话或独立于 Python 脚本启动的任何其他新进程访问。以这种方式设置的环境变量仅影响当前进程及其子进程。
在 LiteLLM Proxy 上设置最大请求/响应大小
如果您想为代理服务器设置最大请求/响应大小,请使用此项。如果请求大小超出限制,将被拒绝并触发 Slack 警报
用法
步骤 1. 设置 max_request_size_mb 和 max_response_size_mb
在此示例中,我们对 max_request_size_mb 设置了非常低的限制,并预期它将被拒绝
在生产环境中,我们建议将 max_request_size_mb / max_response_size_mb 设置在 32 MB 左右
model_list:
  - model_name: fake-openai-endpoint
    litellm_params:
      model: openai/fake
      api_key: fake-key
      api_base: https://exampleopenaiendpoint-production.up.railway.app/
general_settings:
  master_key: sk-1234

  # Security controls
  max_request_size_mb: 0.000000001 # 👈 Key Change - Max Request Size in MB. Set this very low for testing
  max_response_size_mb: 100 # 👈 Key Change - Max Response Size in MB
步骤 2. 使用 /chat/completions 请求进行测试
curl https://:4000/v1/chat/completions \
  -H "Content-Type: application/json" \
  -H "Authorization: Bearer sk-1234" \
  -d '{
    "model": "fake-openai-endpoint",
    "messages": [
      {"role": "user", "content": "Hello, Claude!"}
    ]
  }'
请求的预期响应 由于请求大小超过 max_request_size_mb,我们预期此请求会失败
{"error":{"message":"Request size is too large. Request size is 0.0001125335693359375 MB. Max size is 1e-09 MB","type":"bad_request_error","param":"content-length","code":400}}